Sandpaper Letters + Games
You guys. We are fully immersed in the sandpaper letters over here and I am SO glad we waited until further into the sound games progression before introducing them. Little Miss is fully ready whereas if we had just mastered the initial sound in a word and the first three stages of sound games, I think it would take longer to learn the letters. I can see how after sandpaper letters, children are completely ready for the moveable alphabet as well. To read more about why we waited until later in the sound games progression, check out this article.
At this point, we are 13 letters into the sandpaper letters and our first double sandpaper letter! Some people wait and introduce the double sandpaper letters later and some mingle them in together. Dwyer’s Pamphlet and “Montessori Read and Write” both suggest the later. If you introduce sandpaper letters earlier in the sound games sequence, the child would not be ready for the double sandpaper letters. Many of these sounds do not occur at the beginning of the word. If you lean into sound games and really play with phonemic awareness, it is FUN and the child is ready for both the single and double sandpaper letters.
Letter Order
You might be surprised to find out that in Montessori, the sandpaper letters are not presented in alphabetical order. There are more effective ways to tie the phonetic sounds the child already knows to the letter shape. They are grouped together differently for writing as well (but that’s another post!). Once the names are introduced, (much further down the language progression than you might expect!) it is often done in alphabetical order. We actually plan to use the alphabet song at that point.
There are several options for what order you can present the letters in. It took me a while to settle on one. I finally went with:
s m t a p f c
r b l i g n d
h j k w o u v
y z x q e
This is the order suggested by Sister Mary Ellen Carinato in her book, “Montessori Matters”. I was back and forth between this one and the commonly suggested:
s m a t
c r i p
f b o g
d w e n
k q v x y z
I even considered using the order that we will use with our writing families but ultimately decided that grouping was not as intentional for phonemic association. It is focused on brush strokes (and it should be!) For more letter groupings, check out this blog article by Living Montessori Now.
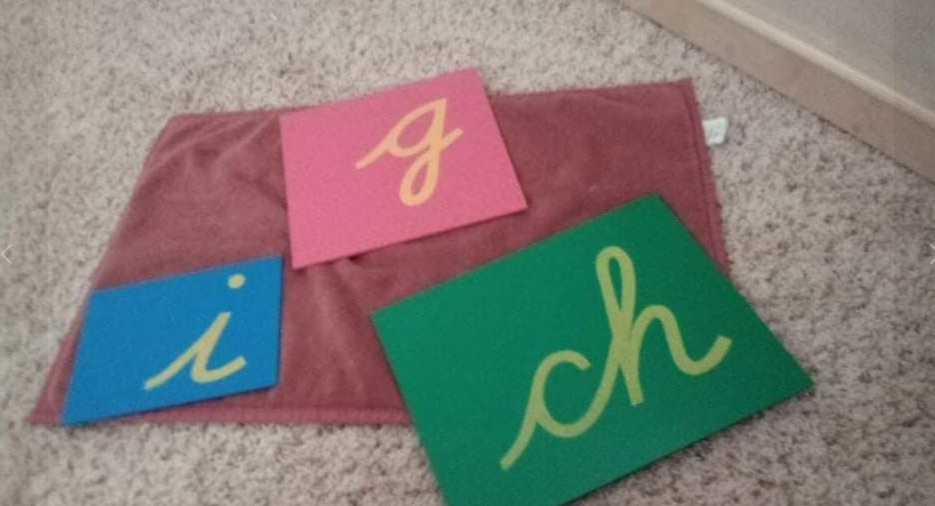
We will continue mixing in some of the double sandpaper letters as we go. At this point we have just introduced “ch”. The first week of sandpaper letters, we focused on just the single letters and played with the sounds associated with the 16 key phonemes that are introduced through the double sandpaper letters. We’ve encountered them all organically through sound games, but I felt I needed to intentionally bring them in again to ensure the foundation had been laid well for them.
In the 2-3 weeks leading up to the introduction of sandpaper letters, we were really into the games that came with the Pumpkin Patch Phonological Awareness Pack so we didn’t play sound games organically with our environment as much. I highly recommend Trillium’s phonological packs, but they focus on the key sounds that are associated with the single sandpaper letters only. I chose to conversationally draw attention to specific sounds and play “I spy” as a refresher. This was enough to begin introducing the double sandpaper letters as well.
How to Present the Sandpaper Letters
Presenting the sandpaper letters is quite straightforward. Use the three period lesson to show the child what it is, have them show you, and then recall on their own. A child doesn’t always move through all three stages of the three period lesson the first time a material or concept is encountered. Just observe and then present again another time. Here is how I presented the sandpaper letters:
We did 3-4 letters at a time (I found 3 worked well for our oldest). I showed one letter at a time and said, this is “aeh” as I pointed to the sandpaper letter a. Then I traced the sandpaper letter with the first two fingers of my dominate hand (which is the same as my oldest. You want to match the exact way the child will need to do it so left handed with a left handed child and right with a right handed child) and said “aeh” as I traced. Then I invite the child to try tracing the letter while saying the letter sound. Repeat this for each letter introduced. Then say, can you show me “aeh”? Which one is “sss”? etc. until you have reviewed them. If the child is still engaged and is ready, you can move to the third stage and say, what is this while pointing to a letter to check for recall. You can also ask for her to hand you specific letters. Some other fun ways to review the letters (either now or the next day) is to change the way you ask for her to show you the letters. Try the words, touch, find, bring, put, feel, hold, trace, and where. This keeps it fresh!
Each day you can review letters your child knows and then add 3 new letters. Take note at how many letters are good for your child to have out at once. More than 6 at once is a little too stimulating with my oldest and she does better when I only have 3-6 on the mat at a time. We can review more (if she is into it) but I keep a stack out of sight to bring out after we do the first set. If I have too many, she starts guessing and doesn’t slow down to think through her response. She may want more out once she is more familiar with them, but for now we just space out our review.
Games to Play with the Sandpaper Letters
We’ve played a few of these games already. I am excited to dive into more of them as we continue to move our way through the sandpaper letters.
- Matching language objects to the corresponding letter – use every day objects from around the house or any language objects that you’ve acquired. We do a mix of both.
- Hide and Seek – Hide the letters and have your child find them.
- Hide and Seek (with language objects or cards) – this is a variation of the first two; you hide the language objects and have them find them to match to the correct letter
- Action words with letters – place letters around the room and have the child hop, jump, dance, etc. to the letter
- Draw attention to letters he/she knows when reading together or in public (like the grocery store)
- Knock knock – start with 3-4 letters and build the game up from there; the letters are upside down on the mat or table. Knock on the letter and say, “Knock, knock, who’s there?” then flip the letter over and name the letter
- Letter books – pick a letter that your child is very familiar with. Then chose a magazine and let the child cut out images to add to their letter book.
- Alphabet Twister – Take a wet erase marker and some of the letters your child has been introduced on the colors. When you spin, say the letter sound not the color. Have them jump, hope, etc. to the letter if they can’t reach well enough to play traditional twister.
What’s next?
Once your child has firmly mastered the sandpaper letters you will move into the parallel paths for writing: The Moveable Alphabet (creative writing; pre-reading activity) and Learning to Write the Letters.
Quick note: at this point, the child has already done many activities to prepare the mind and the hand both directly and indirectly. This started with practical life and sensorial activities (both indirect) and with sound game, sandpaper letters, and metal insets (all direct). The moveable alphabet continues to prepare the child for future handwriting as well. To read more on the preparation for writing and reading, check out this article on Info Montessori.
If you liked this post, you’ll love these: